

LT Laptop Motherboard X540SA VivoBook X540S F540SA A540SA R540SA NB-D540SA N3050 N3060 N3700 N3710Mainboard 2G/4G/8G
Original price was: $92.12.$26.32Current price is: $26.32.

NEW For DELL Vostro 3400 3500 Inspiron 3501 Notebook Mainboard LA-K032P 07HC6F 06PGNJ I3 I5 I7-11TH CPU Laptop Motherboard Test
Original price was: $232.64.$66.47Current price is: $66.47.


DIY MINI ITX Case HTPC Computer Cases transparent Chassis Desktop For Game Chassis support 2.5 SSD 17*17CM
Original price was: $41.97.$11.99Current price is: $11.99.
0
People watching this product now!
Fast Shipping
Carrier information
50 million products
Payment methods
24/7 Support
Unlimited help desk
2-14 day delivery
Track or off orders
Reviews (0)
Description
Name: ITX Mini Transparent Case
Chassis style: vertical / horizontal
Material: Acrylic
Color: Transparent
Applicable motherboard: ITX motherboard
Size: As picture
Compatible power supply: DC-ATX power module / PC power supply
Hard disk station: 2×2.5 inch hard drive
High heat dissipation limit: CPU heat sink ≤27mm (Can not install 37mm radiator)
Accessories: Opening *1, HDD LED light *1, screw *1 set,160W DC-ATX power supply
Note: The memory is in front and on the side, the memory will conflict with the light, please be careful!
The motherboard is not included.
Please tear off the kraft protective layer when installing
Option
only CASE: Only included the ITX case not Motherboard and DC PSU,please tell me what pattern you like

Pattern(In the figure, in order to see the pattern, the protective film is not peeled off, and the actual color is transparent):

Installation steps
1. Fix the screws and short copper posts to the screw holes on the main board.
2. Align the screw holes of the main board with the screw holes of the short copper post, and then tighten the screws.
3. Fix the screws and copper posts to the screw holes around the bottom plate of the chassis.
4. Install the power switch on the front panel; install the hard disk on the side panel (the position of the hard disk should be determined according to the space after the motherboard is installed. If the space is sufficient, 2 hard disks can be installed.
Mounted on 2 side panels)
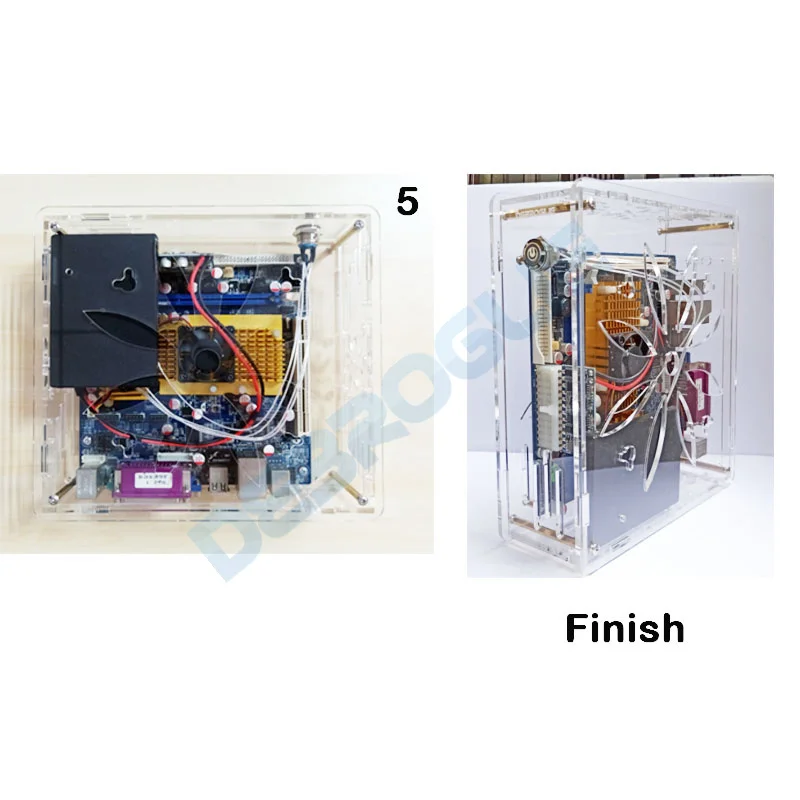
5. Insert the four panels into the slot into the bottom plate.
6. Align the side panel clips, cover the top plate, and finally secure with screws.

Recently Viewed Products

Angel Wings Cremation Urns for Human Ashes Mini Keepsake Urns for Ashes Aluminium alloy Small Memorial Urn
Original price was: $10.01.$2.86Current price is: $2.86.
Li-ion Lithium Polymer Battery 3.7V For 102050 403040 502525 401120 102540 40272 103040 443441 401030 Rechargeable Battery
Original price was: $17.71.$5.06Current price is: $5.06.
New 2025 Fashion-Forward Sneakers spring athleisure sneaker trend, platform couple sneakers
Original price was: $125.05.$35.73Current price is: $35.73.
Plus Size Summer Casual T-shirts Black and Bee Letter Print O Neck Short Sleeve Women Ladies Clothes Tops 3 Types Options
Original price was: $26.67.$7.62Current price is: $7.62.
Small Keepsake Urn for Pet Ashes Paw Print Cat Dog Memorial Decorative Cremation Mini Urns Ashes Holder Aluminium alloy
Original price was: $11.20.$3.20Current price is: $3.20.

